LIKE us AT Facebook! Share and learn tips, techniques, gear and more!
Camping Tarp Ideas
Having spent years and years camping, I can tell you that a good camping tarp can make or break a camping trip.
There are 2 main kinds of tarps for camping:
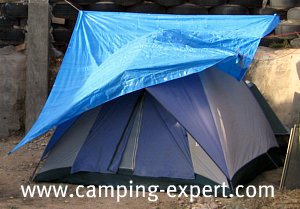
Classic cheap blue tarps. (sometimes green)
Lightweight waterproof specially made for camping.
Now, they are both good tarps, but they are good for different purposes.
Drive in Camping
If you do regular drive in camping, all you need is a blue camping tarp, because weight and size are not an issue. These tarps do not last as long as the tarp below and are much bulkier, but they are cheaper. So if money is a concern, get these ones.
Carry-in Camping: Backpacking, Interior Canoeing etc.
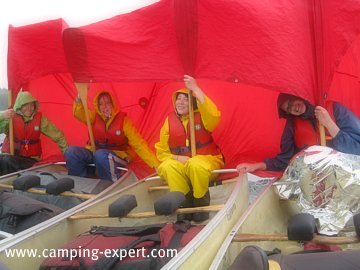
If, however you do interior camping such as backpacking, or canoeing then you will want a lighter tarp. These tarps will be useful for other things while you’re camping too.It is lightweight, waterproof, and packs up pretty small.

Not only do I use it as a camping tarp for when it’s raining to sit under and play charades and cook, I also use it to cover equipment packs at night if I think that it will rain, and also as a ‘sail’ when we have a good tail wind and are canoeing. Sailing in a canoe is pretty sweet. I’ve covered twice the distance than I normally would by sailing.
Other Uses:
• Sailing with your canoe,
• Groundsheets to keep your tent dry from the ground. I put it underneath the tent, MAKING SURE that no parts of the tent peek out from under the tent.
• Super duty fly to keep your tent dry if you’ll be camped in that location for a while.
• As a ‘tent’ if the bugs aren’t bad and it might rain.
Size
How do you know what is a good size? Bigger is better, especially as a shelter, but too big can be, well… too big!. I recommend a good size to be about 10feetx12 feet.
Easy Tarp Set-up
So, now that you’ve figured out what tarp you use, based on your camping style, now I’ll explain how to put it up.
1. First, you will need LOTS of rope.
2. The tarp will be made in an A-shape so that water can flow off both sides and not collect in the middle and sag.
3. Attach one end of your rope to the centre edge of your tarp, and the other end of the long rope to something heavy. I like to use a heavy boot, as it will be securely attached.
4. Now, make sure that everyone is away from the area you plan to throw the boot.
5. Toss the boot (with rope) up to a sturdy branch that doesn’t have too many other branches that will snag the rope.
6. Your boot should go over the branch and fall down the other side.
7. Now, you can raise the tarp. Tie the rope down around the tree at waist height with a knot that is easy to undo. Do not cut the rope, as you may need the length the next time you put your tarp up.
8. Now go to the other side of the tarp, and tie the rope around the opposite middle edge, and again to the boot. Toss as above and tie to a tree.
9. Now all you need to do is tie off the corners.
10. These can be tied off at eye level height, to nearby trees.
Voila!!!
Easy tarp set-up. Now you will stay dry.
Note: A good idea is to practice tossing the boot with rope at home, so that when you’re camping and a storm is coming you’re not trying to do it in a rush. Plus it gives the neighbors something to talk about you!!!
Return from Camping Tarp Ideas to Camping Expert Homepage


New! Comments
Have your say about what you just read! Leave me a comment in the box below.